04/08/2021

By Nikhil Rajendran | Reading time 6 mins

Create an SSRS report for Dynamics 365 – Part 1

I recently came across a requirement where I had to create an SSRS report for Dynamics 365 for a client. This doesn’t sound that easy. Even being in the Dynamics CRM field for quite some time, I had faced several issues while creating the report, so I decided to document the process of creating the report that can be helpful for others.

Business Intelligence - AhaApps

15 Questions to Identify the Gaps in Your CRM

CRM Checklist - AhaApps

Environment Setup:

I used Visual Studio 2015 for creating the report. However, you can use the 2017/19 versions as well. Make sure that the SQL Server Data Tools is installed.  We also need to install the Dynamics 365 Report Authoring Extension. You can download it from here:


https://www.microsoft.com/en-us/download/details.aspx?id=56973


The environment for which I am creating the report is Dynamics 365 9.0 online instance.

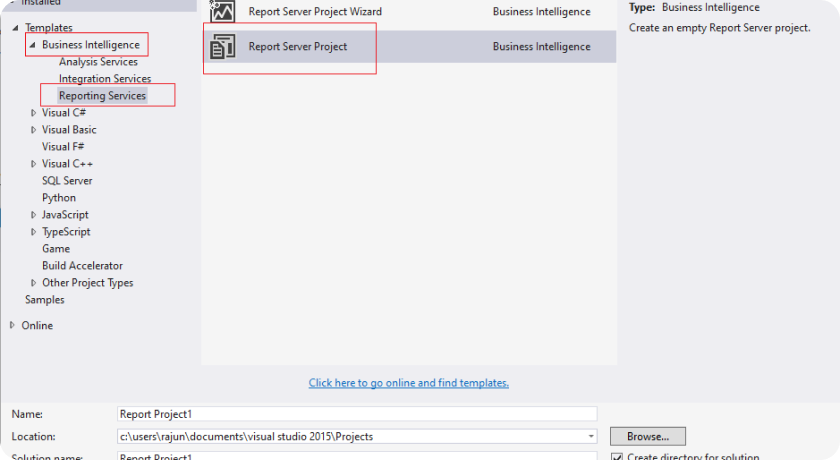
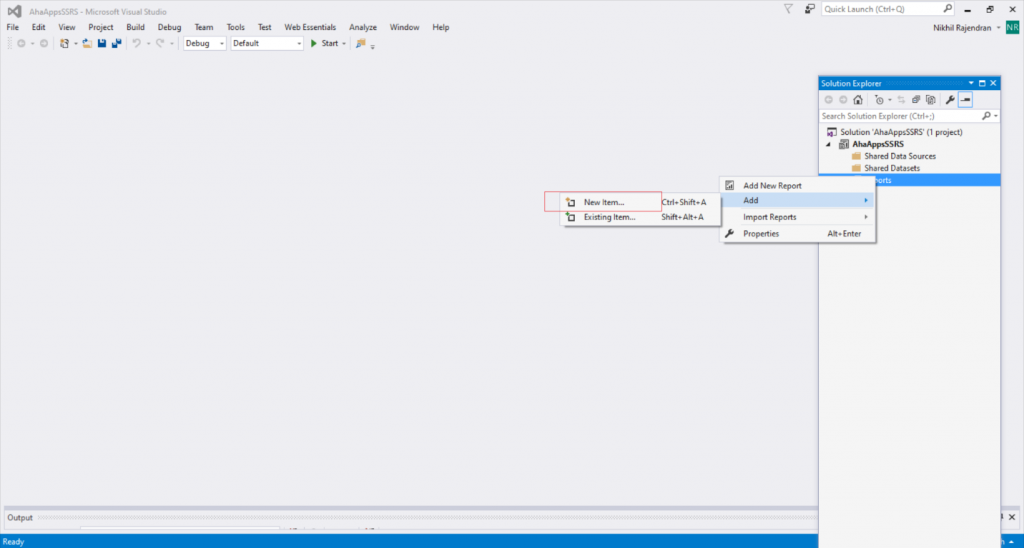
Create the project in Visual Studio :

  • Open your Visual Studio environment.
  • File/New/Project.
  • If the report authoring extension was installed correctly, you should see a screen similar to this:
Create an SSRS report for Dynamics 365 – AhaApps
  • Under Templates, you will see Business Intelligence under which Reporting Services. Select the Report Server Project. Give a Name for the project and click Ok.

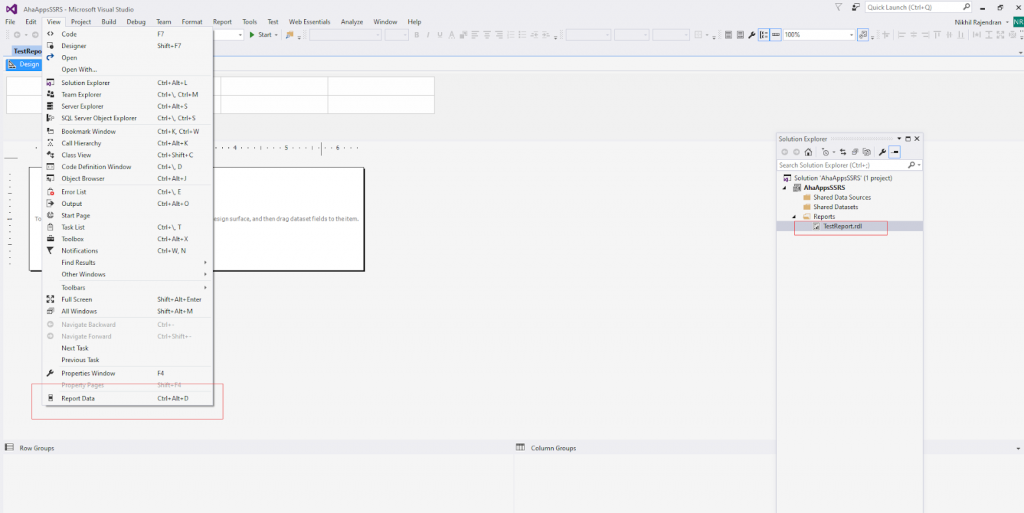
Connecting to Dynamics 365:

  • After creating the project, the first thing you need to do is add a report to your project. To do that, right-click on the reports folder, select Add/New Item.
SSRS report CRM – AhaApps
  • Select “Report”, give a name for the report, and click Add.
SSRS report – AhaApps
  • Make sure the report is selected (there is a black fill around the name). Click on View/Report Data.
SSRS report Microsoft Dynamics CRM – AhaApps
  • Now you will see the Report Data bar. The first thing you need to do is add the data source for the report. To do that right-click on Data Sources and click Add Data Source.
SSRS report Microsoft Dynamics 365 – AhaApps
  • You will now see the data source properties window. Give a name for the Data Source.
  • Ensure that the “Embedded connection” radio button is selected and the type is “Microsoft Dynamics 365 Fetch.”
  • Now we need to enter the Connection String. The connection string will look something like the format of https://your_organization_name_which_is_in_URL.crm.dynamics.com;uniquename
  • After entering the data, the screen will look something like this:
SSRS report Dynamics 365 – AhaApps

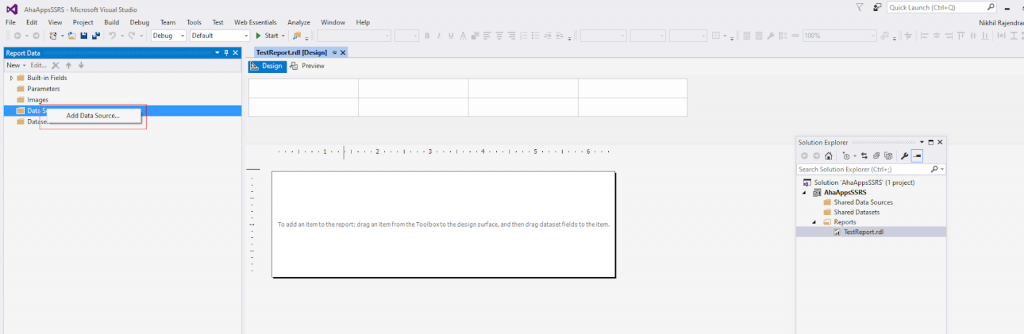
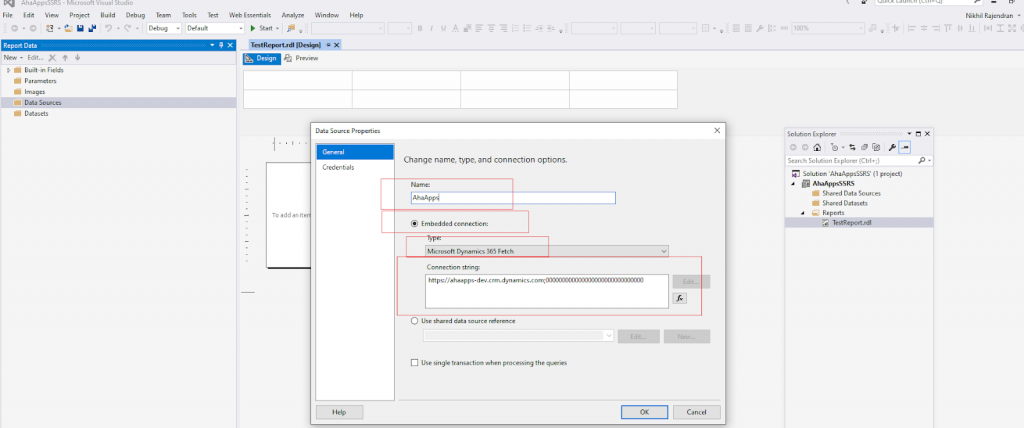
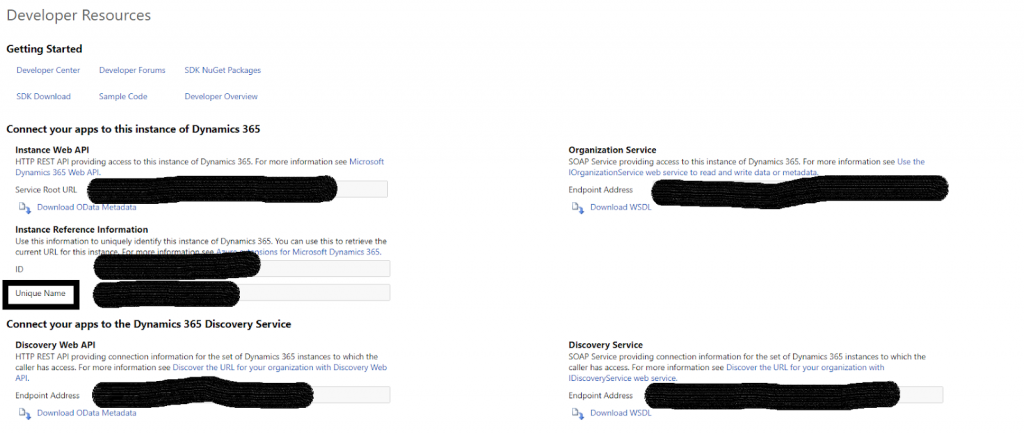
NOTE: There are 2 parts in the connection string separated by the semicolon( ; ) The first part is the organization URL. This is the URL you enter in the browser to connect to the Dynamics 365 environment. The second part is the Organization name. To get the organization name, go to Settings/Advanced Settings/Customizations/Developer Resources. The unique name is the one highlighted below. Copy that and paste it in the connection string.

SSRS report for Dynamics 365 – AhaApps
  • Next, you need to enter the credentials. Choose the “Use this user name and password” and enter the credentials you use to connect to your Dynamics 365 environment and Click Ok.
 
SSRS report - AhaApps

Author’s bio:

Nikhil has been with AhaApps since 2017 as a Microsoft Dynamics CRM Developer. He is a driven CRM expert who is ready to fight off the challenges in the Dynamics world with his technical know-how and prowess. He is a sports enthusiast and loves to play tennis when he gets time. He is also a voracious reader and enjoys reading philosophical books.

Create an SSRS Report for Dynamics 365 – Part 2

What happens next after the data source is added in the SSRS report? Nikhil talks about building the complete report in Part 2.